6 min read
I wish I could say that my life as a plant parent was easy. Of my hobbies, it’s the one that takes the most vigilance and attention. I love my drama queen plants, but I’ve also seen my fair share of nuisances with them. I’ve battled fungal infections, pest issues, burnt leaves, root rot, and more—and lived to tell the tale. The cause of these issues wasn’t good old-fashioned neglect. It was a series of small choices that can wreak havoc in the long term.
I’m here to encourage you to learn from my mistakes. There are a bunch of innocent gardening habits you might think are helping your plants, but are actually hurting them. It’s time to give your plants a fighting chance. Most of these plants can thrive in the wild without special care from us. It’s when we bring them into the indoor controlled environments that we have to give them extra love and attention.
These are the seven most common mistakes you could be making with your houseplants—and how to fix them before it’s too late.
Putting Delicate Plants in the Windowsill

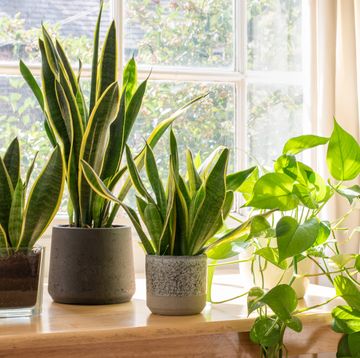
Here’s the truth: plants can get sunburned too! If you place a plant directly on the windowsill, and it’s a window that tends to get a lot of direct sun, those harsh rays can wreak havoc. Plants with delicate, thin leaves are especially susceptible. Think money trees and peace lilies. You’ll notice crispy, white or light-colored patches forming on the leaves. That’s a sign of too much sun exposure.
How to Fix It
Keep your plant in a bright place, but not one with direct sun rays touching the leaves. Move it back from the window. Sadly, you can’t reverse burnt leaves, but future growth should flourish sunburn-free.
Low Light Doesn’t Mean NO Light

Let’s be clear: every plant needs light to grow and nourish itself. So don’t be duped by “low light” plant advertisements. No plant is truly built for a windowless room long-term, so that dark bathroom is not the best place for your pothos.
If you notice slow growth, leggy stems, and slightly pale yellow leaves, chances are your plant is not getting enough light. Pay attention to the direction your windows face. This determines how much sunlight comes through during the day, and therefore which plants will thrive there. Below are some helpful rules of thumb:
- South-facing: bright light. This is ideal for cacti and succulents, birds of paradise, palms, and fiddle leaf figs.
- West-facing: bright in the morning, indirect in the afternoon. This is your sweet spot placement, great for pothos, rubber trees, and philodendrons.
- East-facing: indirect in the morning, low light in the evening. Place your plants with delicate leaves here, like polka dot begonias.
- North-facing: low light. This direction receives the lowest sunlight, so it’s the spot for your most forgiving plants, like snake plants and ZZ plants.
How to Fix It
You can use grow lights to give a plant in a dark room a fighting chance, but make sure to move it occasionally so it gets that natural sunlight.
Overwatering (It’s Not What You Think)

As a helicopter plant parent, I’m all too familiar with overwatering. But contrary to popular belief, it’s not about the volume of water. You can’t really give a plant too much water in one go. But you can water a plant too often.
Strict watering schedules can be surprisingly harmful to your plant collection, because they’re not one-size-fits-all. You need to wait for the soil to dry between waterings, and different plants want different levels of dry soil.
Mushy brown spots are a telltale sign of overwatering. Fungus gnats also love an overwatered plant, so if you notice an abundance of tiny flying pests, wet soil could be to blame. They’re harmless, but annoying.
How to Fix It
Research how much your plant likes to dry out between waterings, and be patient. Check the moisture level of your plants frequently. Moisture meters, chopsticks, your fingers, and your eyes are the best tools to do this. And when you do water, let the water drain. Standing water is the enemy of a plant’s root system, and a one-way ticket to root rot.
Not Cleaning the Leaves

Watering my plants is only 50 percent of my plant care routine. The other half is pruning and cleaning. Plants need clean leaves to photosynthesize properly. Dust, dirt, and debris all block the pores of the plant’s leaves, keeping it from absorbing the nutrients it needs. Your plant can be facing a floor-to-ceiling window, and if its leaves aren’t clean enough, all that sunlight will go to waste.
It’s best to clean your plant’s leaves at night, as when those pores are clear, they’ll burn more easily in the sun.
How to Fix It
Develop a cleaning routine every time you water. At minimum, dust off the leaves with a microfiber cloth. When you’re ready to level up, use a leaf-cleaning spray with microfiber gloves, and massage it gently into the leaves. As you clean, inspect the leaves closely. Some of the most damaging pests are microscopic, from spider mites to thrips, and they love to hide in the nooks and crannies of your leaves. Check the undersides to catch a pest infestation early.


Ignoring Humidity Levels

The best thing you can do for any houseplant is recreate its natural environment. Plants that love the jungle can’t stand dry air, and plants that love the desert shouldn’t be underneath the air-conditioning vent.
Humidity (or lack thereof) is your most important consideration. Keep it consistent, whether you have a succulent garden that needs it low, or a calathea that needs high levels to thrive. As a bonus: this deters spider mites at the same time, as they prefer dry conditions.
How to Fix It
Feel free to start misting with a continuous spray bottle, but note that this is more of a temporary fix. Pooled water on the surface of your leaves creates a fungal breeding ground, so make sure air circulation is high if you go this route. To really give your plant the humidity it needs, worry-free, use a pebble tray filled with water at the plant’s base, or invest in a good humidifier. I personally use the Canopy Bedside Humidifier—it has mold-resistant technology, works with tap water, and it’s dishwasher-safe.
Choosing the Wrong Pot

As a reformed terra-cotta-only plant parent, I want you to know that you have options when it comes to your plant pot. It affects how much moisture your plant will hold onto, and therefore how often you need to water it.
The two most important features to check for are material and size. A plant in a pot that’s too big will rot sooner in all that extra soil. And if the plant needs wetter soil, potting it in a quick-drying material requires way more attention. Make the right decision when you buy the plant, and save yourself some repotting mess down the line.
How to Fix It
You’ll know it’s time to repot when roots start growing out of drainage holes, or look like they’re choking the soil. When you repot, only go up two inches in diameter at a time. When in doubt, err on the smaller side. My personal favorite kind of pot is a ceramic pot that’s glazed on the outside, but unglazed inside. But you can find the best fit with the guidance below:
- Terracotta with drainage: affordable, easy to find, porous enough for plants that like to dry out
- Plastic with drainage: clear nursery pots are great for monitoring root growth, and the plastic holds the moisture longer
- Ceramic without drainage: great for moisture-loving plants, but best if you put a plastic pot inside that you can remove easily, rather than plant directly in a decorative container
Introducing Brand-New Plants to Your Collection on Day One

If you follow only one piece of advice from me, make it to quarantine your new plants. So many of the above concerns can be avoided if you take this one crucial step. Once you’ve selected your new plant to bring home from the nursery, wait before you place it next to your existing collection. Isolating it first gives you time to really understand the plant’s needs and address any hidden issues before they spread to the rest of your indoor garden.
How to Fix It
For two to three weeks, place the new plant at least six feet away from your existing ones. This is long enough for a pest life cycle to develop or for fungal issues to surface, so you can address them in isolation. When you are taking care of the quarantined plant, make sure to wash your tools thoroughly to avoid spreading issues to the rest of your plant family.